

Test in the emulator
Run your vertices with real tokens and services, then check what they did.
Run a vertex
Section titled “Run a vertex”-
Start the emulator, and upload your application with
npm run emulate. -
Services. On the Services page, add the credentials and values that your services need. Then select them for the application, and on each vertex’s Services tab.
-
Settings. If the vertex has a settings page, click Configure, and save valid settings.
-
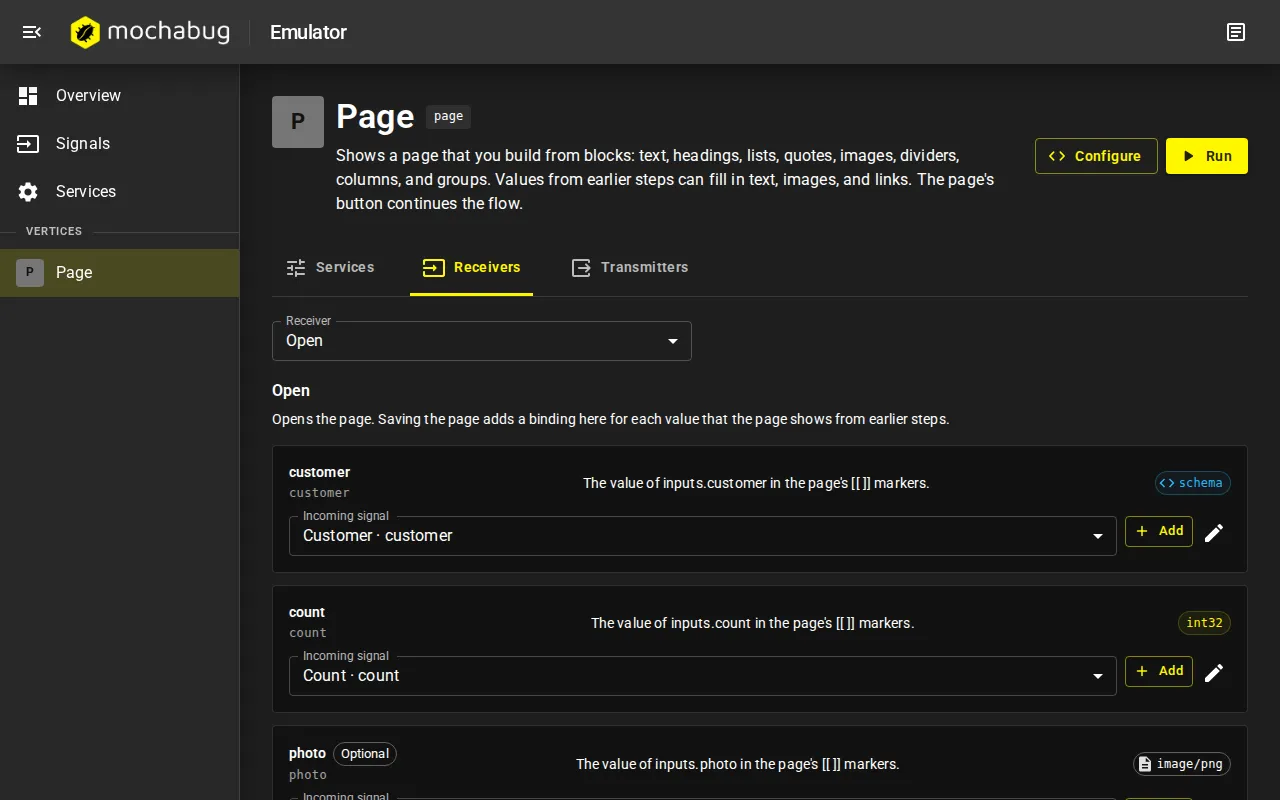
Inputs. On the vertex’s Receivers tab, choose the receiver and bind its inputs to signals. Only compatible signals are listed. Add more on the Signals page.
-
Run. Click Run, and use the page if the vertex has one.
-
Check. The Emulator tab shows the outputs. Console shows your logs.
A vertex that stays active, such as a dashboard, runs until you stop it. Stopping calls your onStop handler.
Read the results
Section titled “Read the results”- A run completes when the vertex sends on a standard or failure transmitter. A stream transmitter does not complete it.
- A failure output still gives the status
VERTEX_RUN_STATUS_SUCCEEDED. Check the output’s mode to tell. - The next run replaces the recorded outputs, so save what you need.
See Transmitter modes.
Check authorization
Section titled “Check authorization”Your pages get real tokens in the emulator, so you can test your access rules. Call a protected route without a valid token. Use the address from executorUrl in the vertex’s API response:
curl -i https://exec-….emulator.localhost:51003/api/items # 401curl -i -H "Authorization: Bearer invalid" \ https://exec-….emulator.localhost:51003/api/items # 403Also try the settings page’s token, and a token from an earlier run. See Endpoint security.
Measure resource use
Section titled “Measure resource use”The Resources tab shows CPU time, wall time, and memory for each entry point. Compare each invocation with the limits in runtime.json.
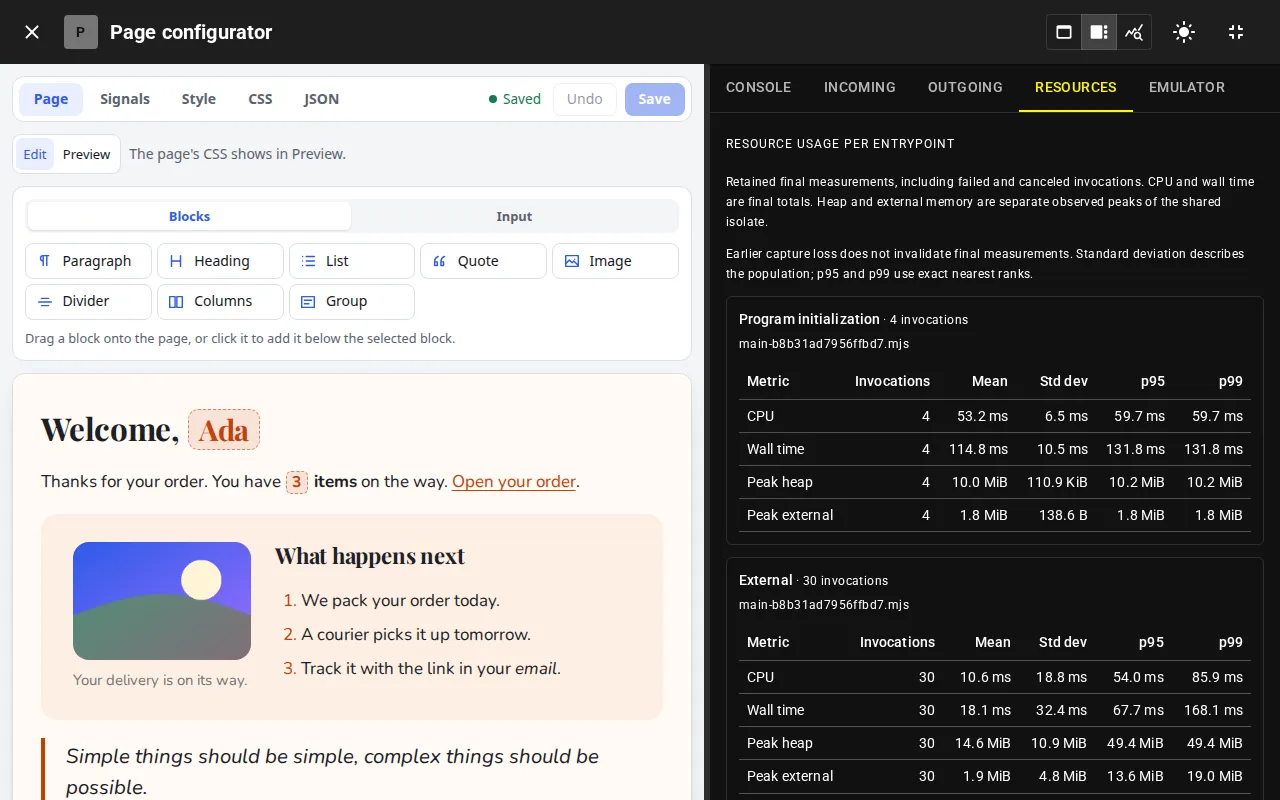
Test with the largest inputs that you support, and keep a margin. If you come close to a limit, do less work, or raise the limit.
Simulate exchanges
Section titled “Simulate exchanges”The emulator has no graph, so a small JavaScript program stands in for each exchange that your vertex dispatches. The emulator creates a starter program. Edit it, and apply it before you run.
Use the API
Section titled “Use the API”Everything in the interface is also available through the emulator’s API. Its reference is at http://localhost:51001/docs/, with OpenAPI files for REST and Connect.
# The uploaded application, and its generationcurl -s http://localhost:51001/v1/emulator/state
# A vertex: readiness, page addresses, and its latest runcurl -s http://localhost:51001/v1/emulator/vertices/greeting
# Start a runcurl -s -X POST http://localhost:51001/v1/emulator/vertices/greeting/run:start \ -H "Content-Type: application/json" -d '{"generation": "<generation>"}'- Each change needs the current
generationfrom the state. If a request fails withABORTED, read the state again, and retry. - When a vertex cannot run,
runReadinessin the vertex response says why. - The page addresses carry the browser token in the
#mb_tokenfragment.
The API never returns saved secrets, so it is safe to let a coding agent use it.
Let your agent test
Section titled “Let your agent test”With the adapt-emulator skill, a coding agent can run these checks for you:
Test ticket_form/ in the emulator. Run the vertex with test signals, check theoutputs, check that the API rejects missing and invalid tokens, and measure theresource use. Record the results.You still enter the secrets on the Services page, and sign in for OAuth2 consent.
What the emulator cannot show
Section titled “What the emulator cannot show”The rest of the graph, parallel sessions, and how an update treats deployed state. Test parallel sessions and old data in unit tests, and record what you could not test.